Tackling a kitchen backsplash tile project might seem like it's best left to the pros, but I’m here to tell you it’s totally doable as a DIY. I recently tiled the backsplash in our kitchen, and not only did it transform the entire space, but it also gave me a huge confidence boost. I had my friend come and help, who has tiled many backsplashes before, so I learned a lot from him and am here to share with you so you can learn too! If you’ve been thinking about doing this yourself, I’m breaking it down step by step.
Also, you might find some kitchen backsplash tiles ideas from this post!
What materials and tools do I need for a kitchen backsplash tile project?
Before you start tiling, it’s important to have the right materials on hand. Here’s a list of what I used for my project:
materials
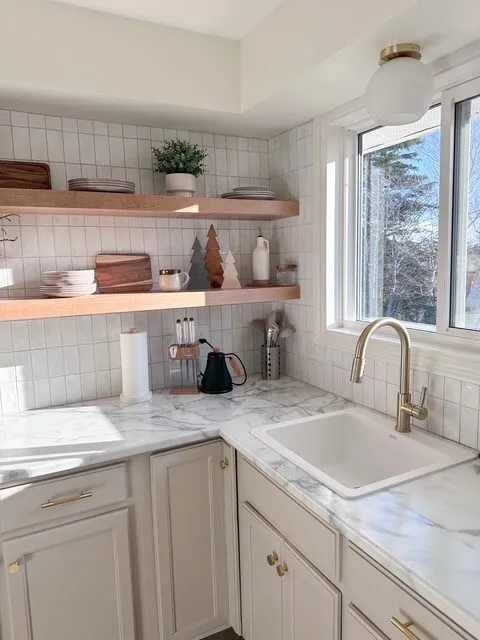
- Tile of your choice- I used Memorie by Stone Tile International
- Tile adhesive
- Tile edge trim
- Grout -I used a warm grey—it’s softer than stark white but still classic
- Tile spacers (⅛" or 1/16" depending on your tile)
tools
- Tile cutter or wet saw - I used a manual tile cutter
- Notched trowel
- Grout float
- Sponge and bucket
- Level
- Tape measure
- Pencil
- Utility knife
- Painter’s tape
- cardboard or paper to protect countertops when grouting

This post may contain affiliate links, which means I may earn a small commission—at no extra cost to you. Thank you for supporting my blog!
Should you tile vertically or in a subway pattern?
This comes down to style, but here’s what to consider for your kitchen backsplash tile project:
- Subway-style (staggered) is timeless and forgiving—great for beginners.
- Vertical stack or straight stack gives a modern look but requires a bit more precision. Still, I would consider this easy.
- If you want to visually heighten the space, vertical stacking can draw the eye up.
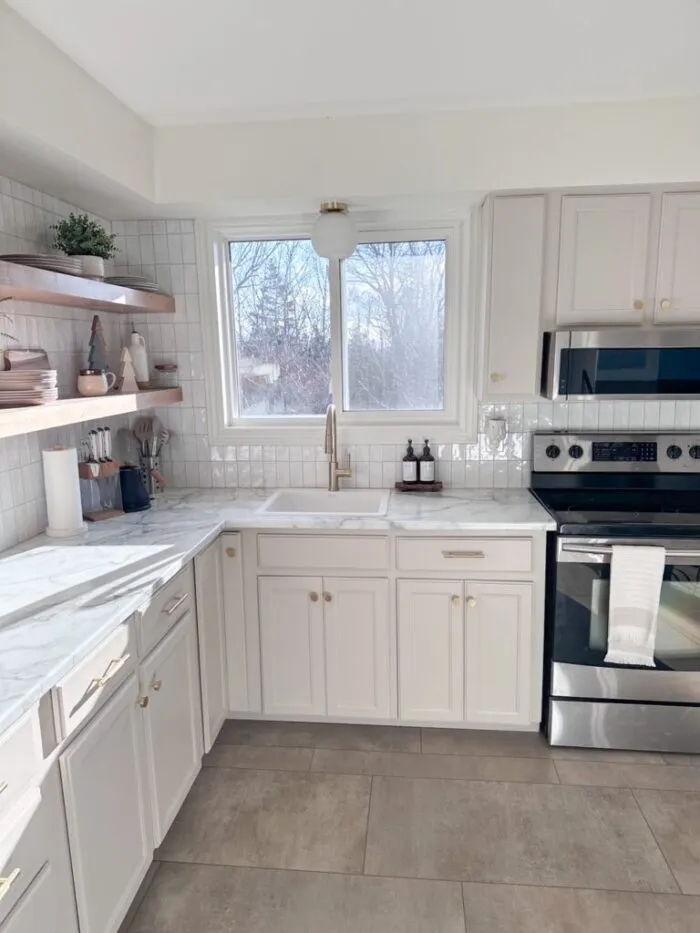
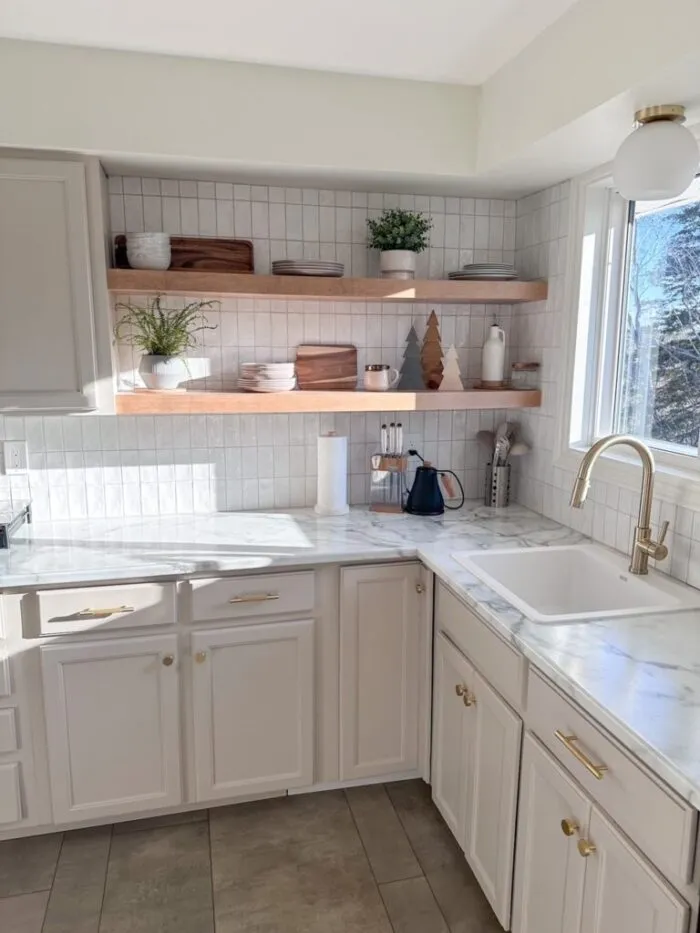
I went with vertically stacked as I felt it was more modern. We also have low cabinets, and I felt it made the space feel "taller" than it actually is. The tile I went with was also forgiving when it came to stacking them, as they weren't perfectly rectangular.
What Do I need to do to prep before tiling?
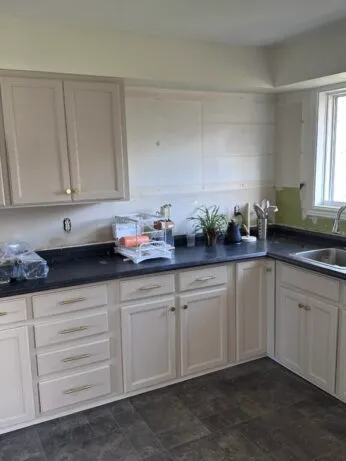
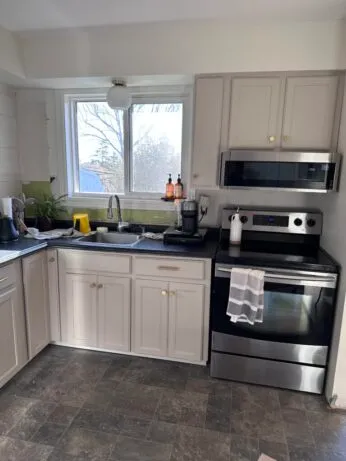
You want to ensure that your surface is free from any peeling paint or debris. Our kitchen had a peel and stick backsplash that we removed so there was peeling paint and drywall bits. I used a flat scraper to remove everything and then sanded anything left to ensure it was a smooth surface!
Remove any plug outlets. You may need to purchase an extender, as the tile thickness may interfere with reinstalling your power outlets.
Thinking about replacing your kitchen outlets? Good call! We did too. Check out my blog post HERE on how to replace your electrical outlets.
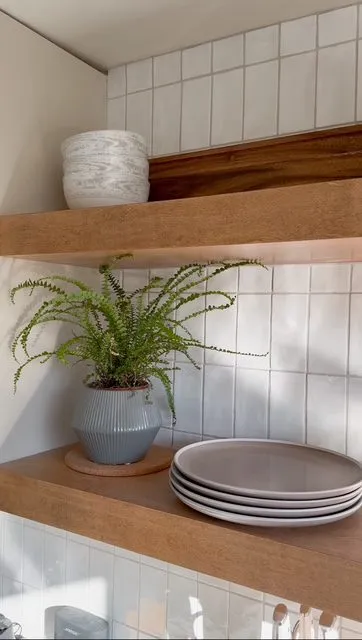
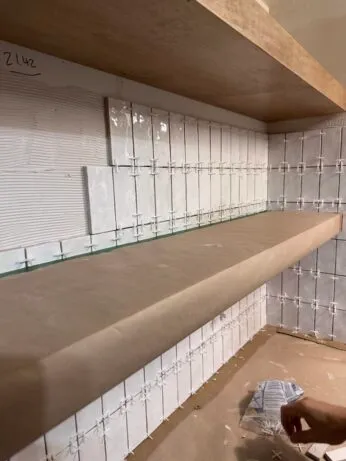
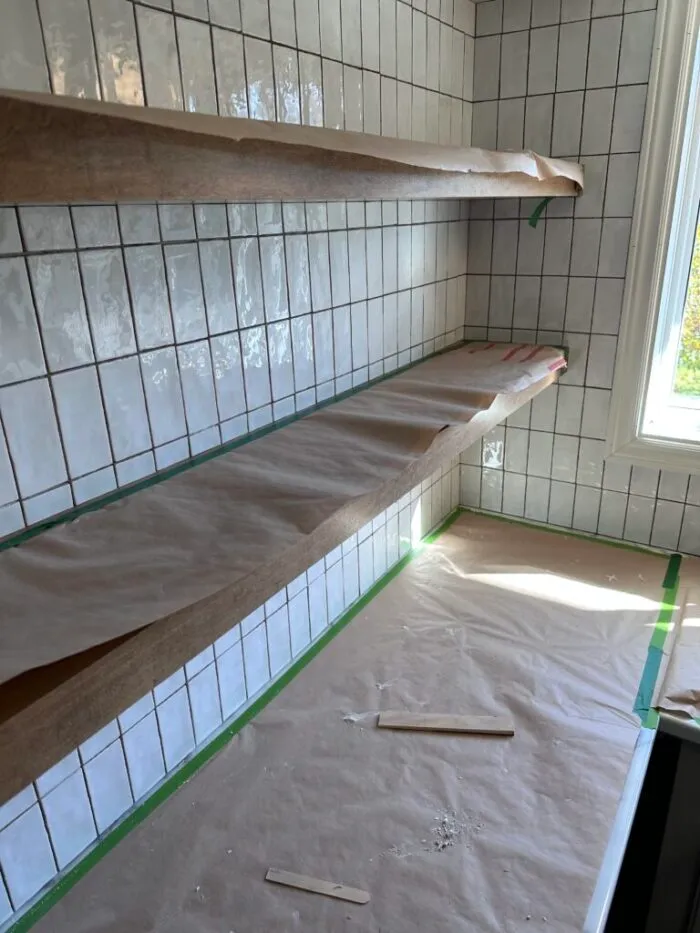
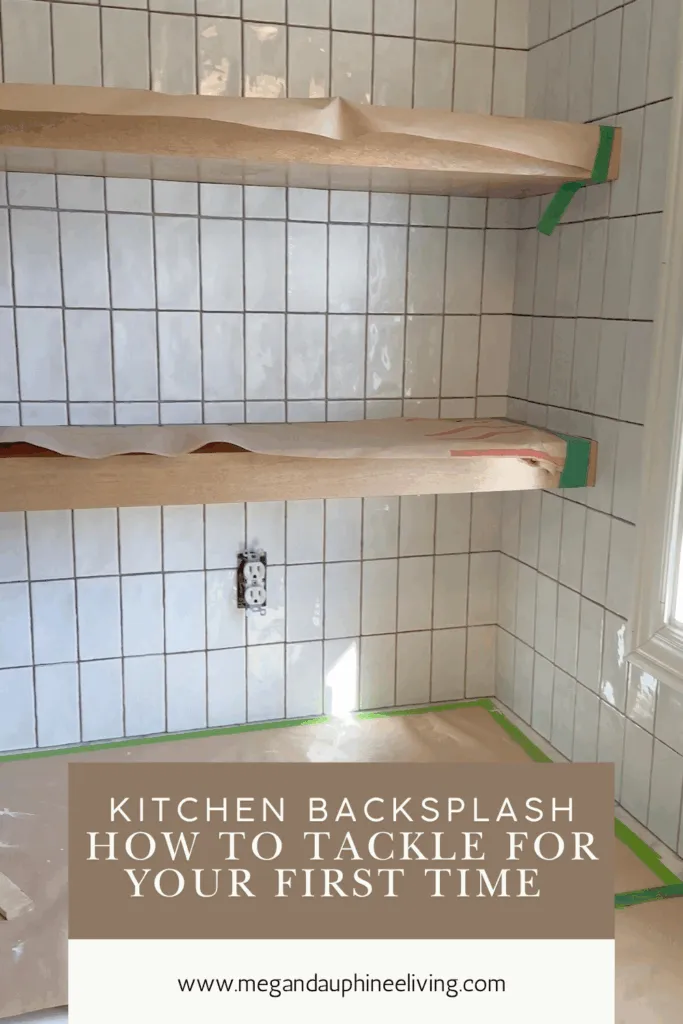
We removed two cupboards and replaced them with floating shelves which we decided to install first so that we could tile around them.
If you want to see this entire kitchen renovation from start to finish you can check out my blog post HERE
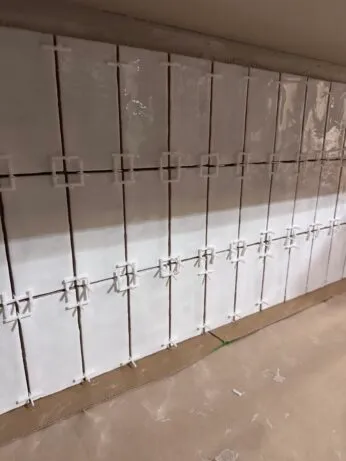
How do you start your first row of backsplash tile?

Whether you're going for a classic subway layout or a sleek stacked pattern, how you start your first row can make or break the look of your entire backsplash.
A common mistake is starting at one end of the wall and working across, only to realize at the very end you’re left with a skinny sliver of tile—not ideal. These narrow end pieces draw the eye in all the wrong ways and can make the whole project look off-balance.
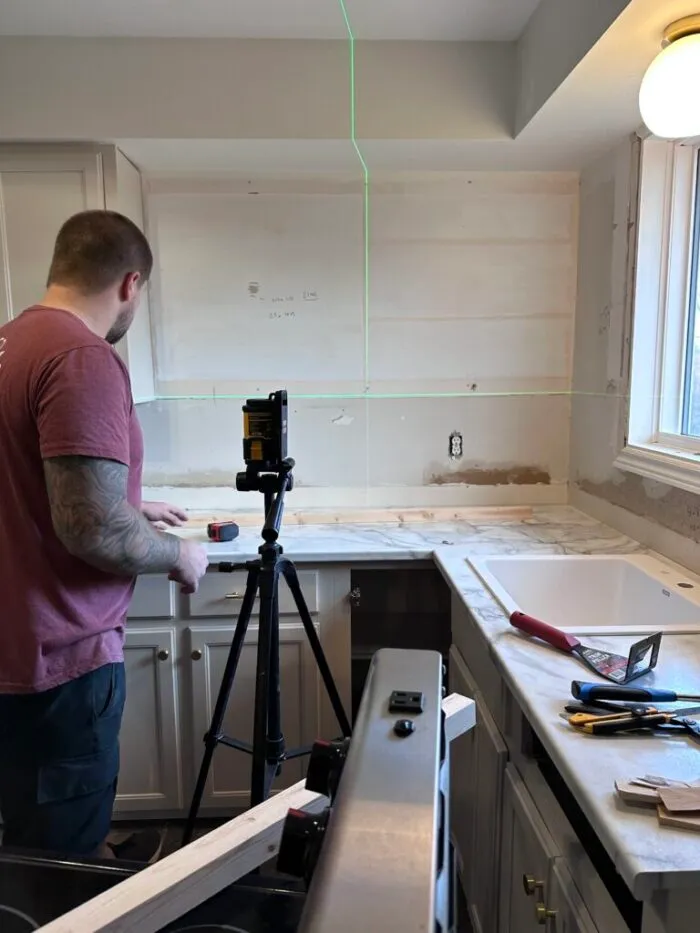
Instead, take a few minutes to plan your layout before you even pick up a trowel. Measure the full length of your wall, the width of your tiles, and factor in the spacer size. Then divide it out to see where your tiles will land. This lets you adjust your starting point—so you can center the tile layout or balance the cuts on both ends for a cleaner finish.
Also consider any focal points:
- Do you want a full tile centered behind your faucet or sink?
- Will your tile run up along the sides of a window or around upper cabinets?
Planning around these visual anchors helps create a symmetrical, professional-looking result. Trust me, a little math upfront saves you a lot of regret (and recutting) later on.
- Find your center point if you’re doing a feature wall or want symmetry.
- Use a level to draw a straight line across the wall where your first row will sit. We used a laser level and this was an amazing tool and totally worth the investment for this type of project! Don’t assume your counter is perfectly level.
- Set a temporary piece of cardboard along the countertop or wood along the line if needed to support the tile while the adhesive sets.

when do you use tile edging or finish trim?
Tile trim edge (also called tile edging or finishing trim) is one of those small details that makes a big difference in both the look and function of your backsplash. But when exactly do you need it?
In our kitchen, we used trim edge behind the stove, where the tile ran along a short wall section. Since there was no counter to support the tile, we screwed the trim edge in level to act as a ledge—basically creating a straight, supportive line for the first row of tiles to rest on. This made it easier to get a clean, level start and ensured the tile wouldn’t sag while the adhesive dried. We also made sure to carry our cardboard protection over the trim so that there was a slight gap underneath.
Another common spot for tile edge trim is where your backsplash ends, especially if it’s not up against a cabinet or wall. It gives that exposed edge a finished, professional look and protects the tile corners from chipping. In our case, we ran the tile all the way to the wall behind the stove, so we didn’t need trim there. And while we could’ve used it on the end by the fridge, we tucked the tile far enough back behind the appliance that it wasn’t necessary or visible.
here is when to use finishing trim
- When tile ends in the middle of a wall (not against cabinetry or another surface)
- When you need a straight edge to start your first row (like behind a stove)
- Around windows, shelves, or open edges where the tile is exposed
- To create a clean transition between tile and drywall
How do you cut backsplash tile?
This depends on your tile type. I used a manual tile cutter, but you could use a wet saw as well. I mainly only had to cut the tiles straight to fit under the cabinets on the top row or along the floating shelves.
- Manual tile cutter is perfect for quick, straight cuts on ceramic or porcelain.
- Wet saw is your best friend for L-shaped cuts (like around outlets) or thicker materials like marble or glass.
Tip: Always wear safety glasses, and take your time measuring twice before cutting once.
How to Apply Tile to the Adhesive (Without Making a Mess)
Once your layout is planned and your adhesive is ready, it’s time to start placing tiles. This part is super satisfying—but it’s also where things can get a little messy if you’re not careful.
Work in small sections.
Don’t try to cover the entire wall with adhesive at once—it dries faster than you think. Apply just enough to set a few tiles at a time. This gives you room to adjust and keeps the glue workable.
You want enough adhesive to get a solid bond, but not so much that it oozes into the grout lines. I found the best method was to line up the tile right next to the one I just placed, then gently push it away from that tile. This made room for the spacer and helped avoid squishing glue between the joints. It worked perfectly and kept cleanup to a minimum.
Avoid pressing the tile straight into the glue with too much pressure—that’s how you end up with adhesive squeezing into your grout lines. And once that hardens, you’ll have to scrape it out before grouting, which is no fun.
For hard-to-reach areas (like behind the stove or under a cabinet lip), it’s sometimes easier to apply the adhesive directly to the back of the tile instead of the wall. We used popsicle sticks for this and it worked great—mess-free and super easy to control.
How do you grout kitchen backsplash tile?
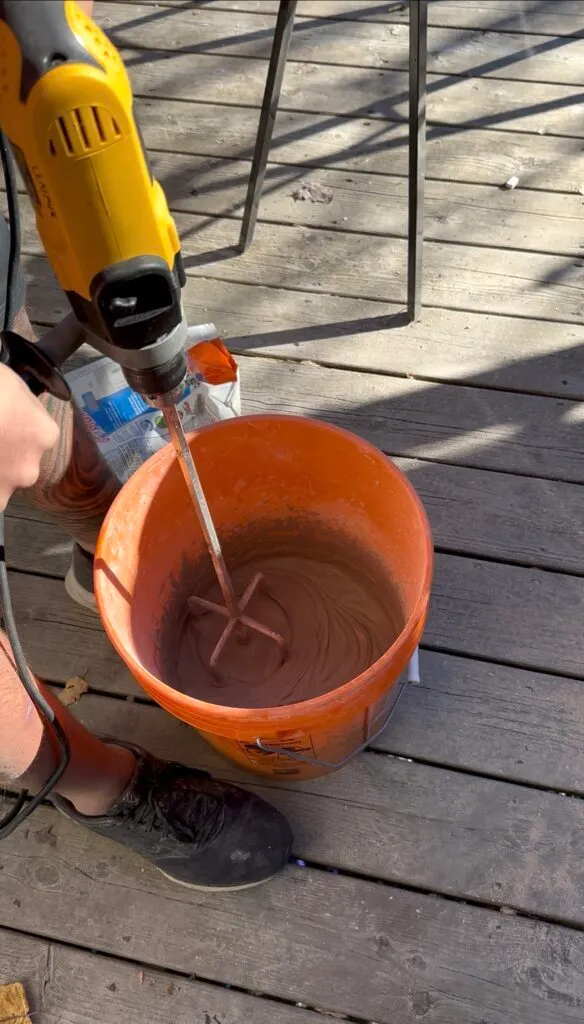
Grouting is surprisingly satisfying and makes the whole wall come together! It can be a messy process but it is very easy! Here's how I did it:
- Wait at least 24 hours after tiling for adhesive to set.
- Mix your grout to a peanut-butter-like consistency. It is okay if it is a little runny, just aim for peanut-butter consistency.
- Use a grout float to press the grout diagonally into the joints. You want to really smear it in there!
- Wipe excess grout off the tile with a damp sponge, rinsing frequently.
- Let it dry and then buff the haze off the tile with a clean cloth.
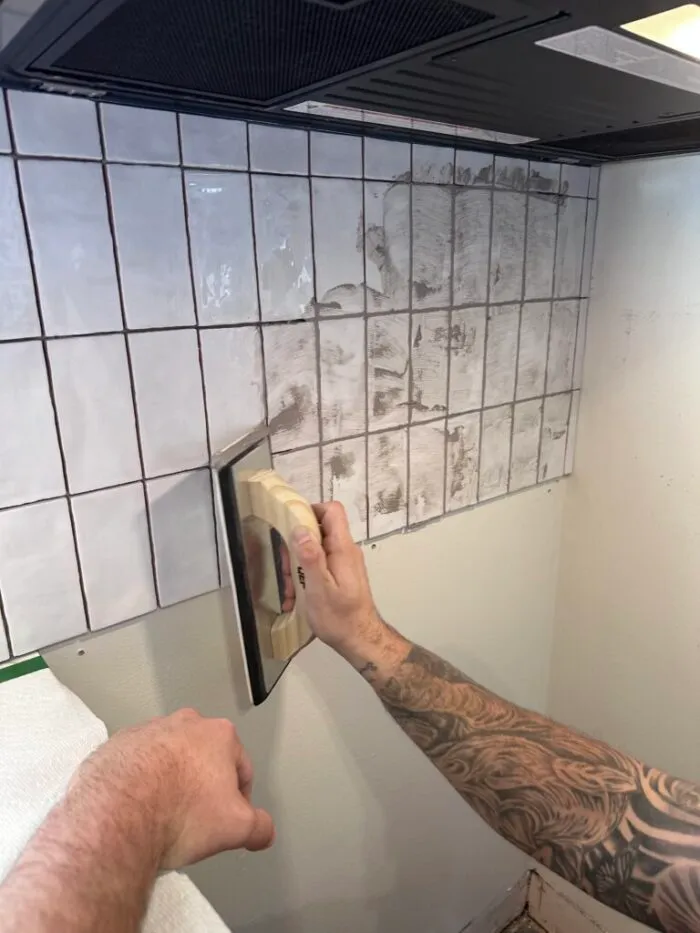
For some sections it was hard to get into the joints with the grout float like along the floating shelves and the countertop so I just used my finger to smear it in there. Once you go over it with the damp sponge it will create a seamless look.
It is important to note over time the grout along the countertops and floating shelves will start to crack. This is inevitable as things settle and shift as your home gets cold and warm. Mine is starting to crack slightly. To fix this, you can eventually take a utility knife and scrap out the grout (only along the countertops or shelves) and then seal it with silicone! This was a good tip from my experienced friend.
What color grout should I use?
This was my most researched question I asked when I was doing this project! I wanted something that looked modern and flowed nicely with the white tile, but I was worried white would be too stark and get dirty too quickly. On the flip side, I didn't want something too dark and draw too much attention to the grout.
Ultimately, I went with warm grey—it complements most tile types, hides stains better than white, and feels softer than stark black. Many tilers said this is their go-to and I can see why. It’s the perfect in-between if you want subtle definition without high contrast.
How long does it take to tile a kitchen backsplash?
This was a weekend project for us with helping hands. It was my husband, our friend and myself that tackled this project. With a few drinks, good tunes, we had a fun time. We also installed the countertops and floating shelves all in the weekend so if you are just doing the backsplash you can certainly get this done on the weekend!
- Tiling took about 4-6 hours (we had to make a lot of straight cuts to get around the floating shelves)
- Wait until the next day to grout
- Grout only took about 2-3 hours with clean up
Is tiling a backsplash hard?
Honestly? It’s not hard—but it is meticulous. I was nervous to tackle this project on my own and had heard of using the MusselBound instead of the adhesive but after doing it (with our friends guidance) I am very confident to tackle this project again on my own! I don't think you need to use the Musselbound - it is expensive and the adheive was very easy to use.
If you can measure accurately, make your cuts appropriately, and have a little patience, you can 100% do this! It will be so rewarding and look fabulous!
final thoughts for your kitchen backsplash tile project
If you’ve been hesitating, let this be your sign. Tiling a backsplash is one of the best DIY upgrades you can make in a kitchen—and it’s completely manageable with the right prep and tools. I hope my experience helps you feel confident enough to start your own.
You must check out PAINTING OVER PAINTED KITCHEN CABINETS: A RENOVATION YOU'LL LOVE
Loved this project? Let’s stay connected!
If you found this DIY guide helpful, don’t forget to save it for later by pinning it to your favorite Pinterest board! It’s the easiest way to come back when you’re ready to tackle this project.
Want more inspiration?
Sign up for my newsletter and get exclusive step-by-step guides, budget-friendly home ideas, and my favorite product recommendations delivered straight to your inbox. Plus, you’ll be the first to know about new DIY projects!
Let me know how your project turns out—I’d love to see your results!