This is THE only faux wood technique you need to know!
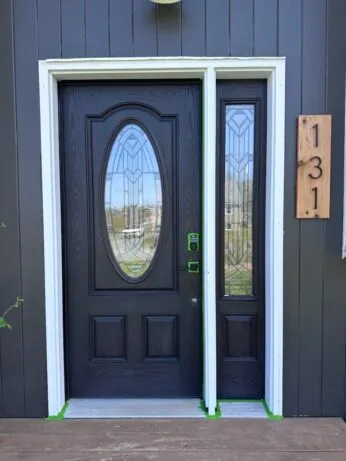
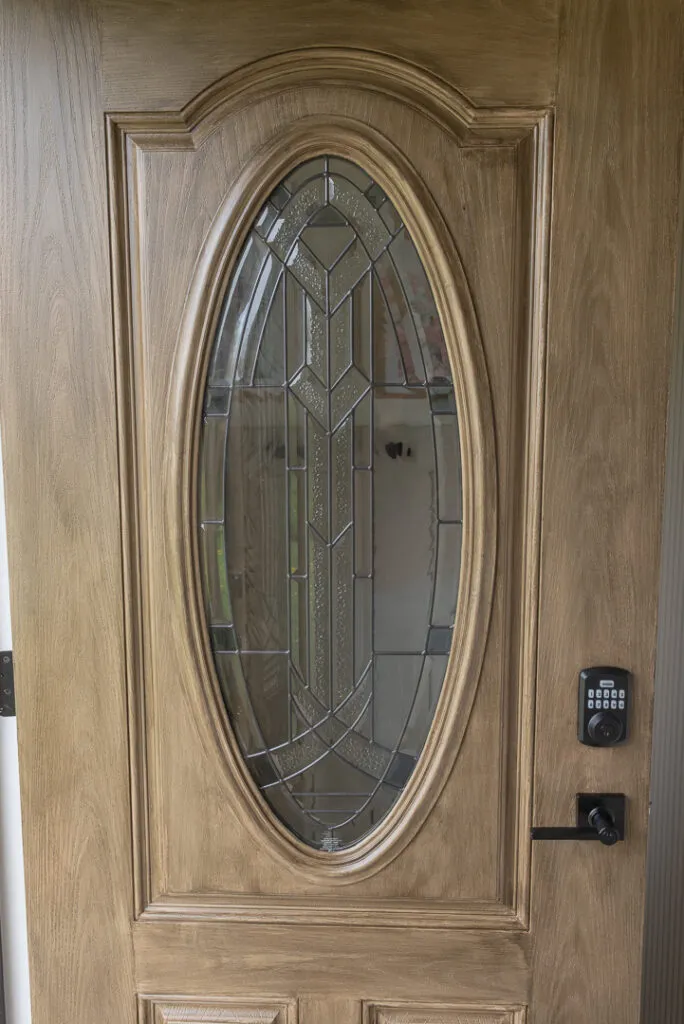
When we moved in, I wasn’t in love with our front door—but I also wasn’t ready to spend $2,500-$5,000 replacing it with a wood front door. So instead of ripping it out, I decided to work with what I had and try a faux wood painting technique using the Retique It Smooth Finish Kit in the color Barnwood (they have lots of colors to choose from). My door already had a faux wood grain on it but if yours didn't and you wanted that look, Retique It also sells a kit that includes a tool to create the grains! I'd like to thank Retique It for the gifted product for this project.
This DIY turned out better than I imagined. If you’ve been wondering how to get the look of a real wood door—without actually buying one—this post will walk you through every step using paint that looks like wood. The best part, is that this kit and faux wood painting technique can be used on cabinets, furniture, and any project you want to apply it to!
What tools do I need for a DIY "wood look paint" project?
Here’s what I used:
- Retique It Smooth Finish Kit
- Dish soap + bristle brush (for cleaning grooves)
- 220-grit sandpaper
- Painter’s tape
- Paintbrush and a rag
- Optional: misting bottle for better stain control outdoors if drying too quick
- utility knife to scrape paint off the glass
Video
steps to achieving the faux wood technique
Step 1: Clean + Prep for the Faux Wood Finish

Like any good painting project, prep is everything—especially if you want a smooth and lasting faux wood finish.
I started by cleaning the door with regular degreasing dish soap and a bristle brush, which helped get into all the little grooves. Once it was dry, I did a light scuff sand with 220-grit sandpaper. This helps the primer bond better and gives your paint a clean surface to stick to.
There were also a few screw holes left behind from the old door handle, so I filled those in and sanded them smooth.
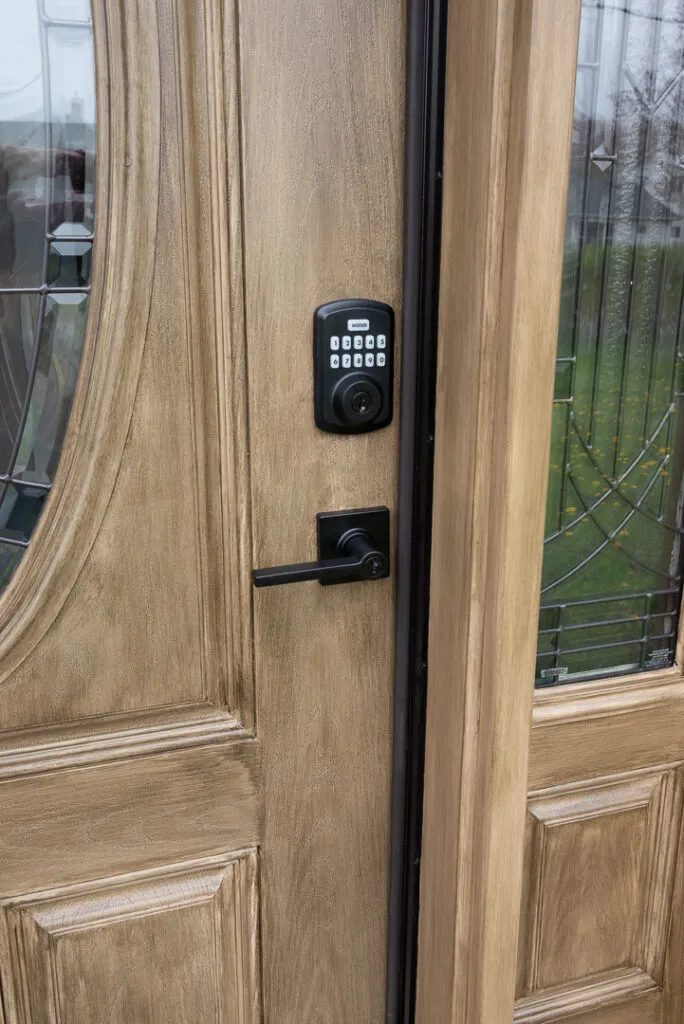
Then, I taped off the areas I didn’t want painted (like the door hardware and glass insert).
Step 2: Applying the Retique It Wood’n Primer
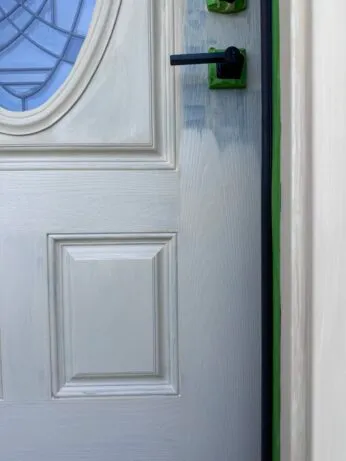
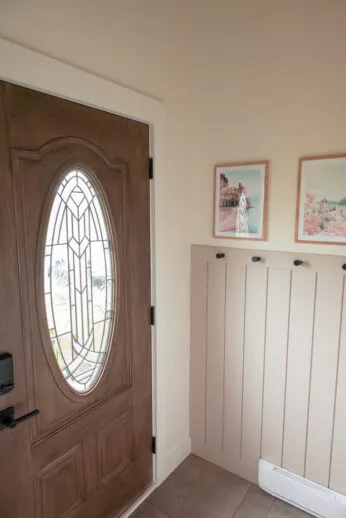
I decided that I wanted to paint the trim around the door as well, so that it looked bigger and more high-end. The white trim was drawing the eye away from the door and seemed disconnected.
I used the Retique It Smooth Kit because my door already had a faux wood grain texture. If you’re working with a flat surface, you can grab one of their kits that comes with a wood grain tool to create your own texture.
This product is honestly impressive—it contains real wood fibers in the primer, which gives the finish that authentic wood feel. I applied two coats of the Wood’n Primer with a brush, just like regular paint. Super easy and beginner-friendly.
Tip: When painting around the glass of a door, don't worry about taping the glass. It is okay to get a bit of paint on the glass section. Once dried, you will take a utility knife with a FRESH BLADE (very important) and score along the edge. Then take a flat blade (or use the utility knife) and scrape the paint off the glass. It comes off super easily and ensures you have a polished finish!
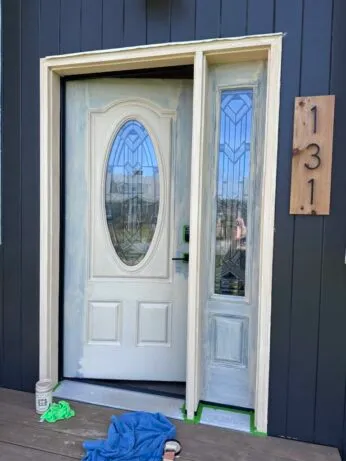
step 3: staining to achieve the faux wood look
Once the primer dried, I moved onto the stain layer using the color Barnwood.
I started with the door frame and applied the stain with a rag. It looked good but dried quickly outdoors, which made it tricky to blend. I grabbed a misting bottle and lightly spritzed the surface—this gave me more working time and helped the stain spread more evenly.
The rag applied a very thin coat, which I liked at first, but then I switched to a brush and found it easier and faster. The brush gave me more control and a richer tone with one coat. By the time I got to the actual door, I skipped the rag entirely and used only a brush.
In hindsight: I wish I had used just a brush from the start and only done one coat. I went a bit darker than planned because I had already done two coats on the frame and wanted the door to match. But I still love the results!
step 4: Final touch ups
Once everything was dried, I removed the tape. Now - typically I remove the tape right away before the paint dries but I was lazy and didn't want to re-tape for each coat and stain layer. So I left it. Instead of just ripping the tape off, I scored it with my utility knife and then carefully peeled it away to ensure I did not lift the fresh paint off the door. Luckily, no issues!
I used two fresh blades to score along all the window glass and scrape back any paint that got on the window. You will know when it is time to change the blade as it will start to pull at the paint in areas you don't want it to! Switching to a fresh blade and taking your time here will be worth it!
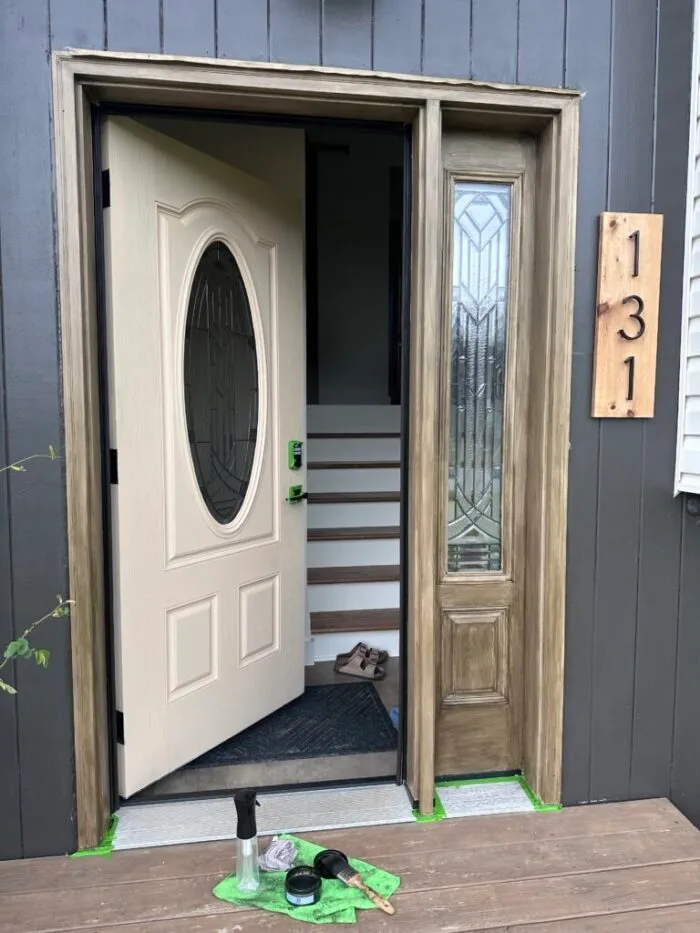
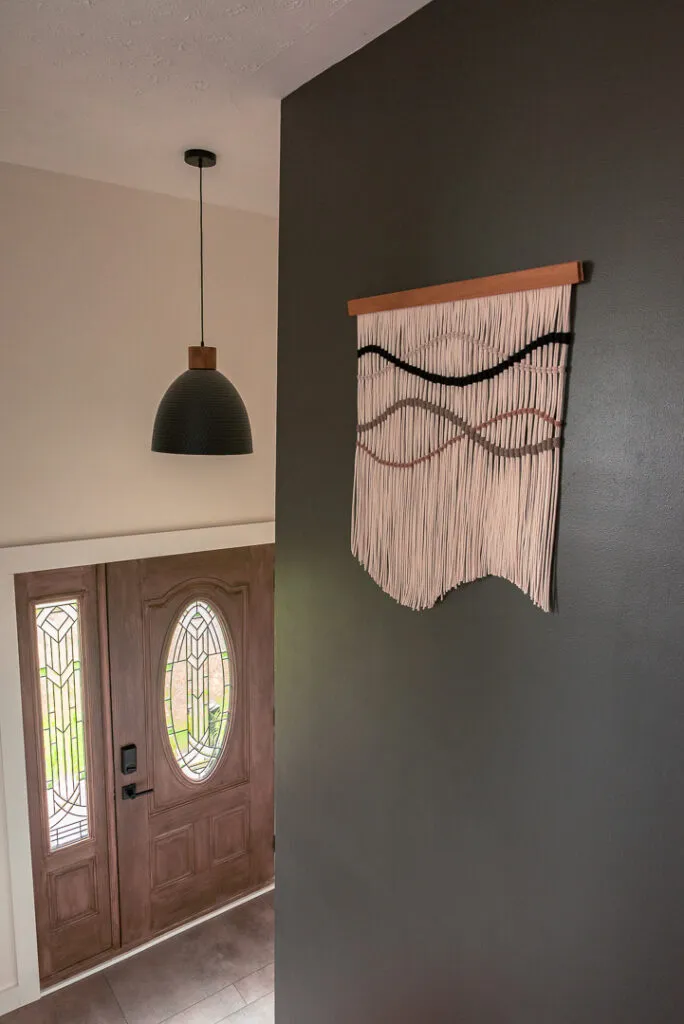
final look

Even with the slightly darker tone, I love how it turned out! The finish gave our basic front door a warm, natural look—and nobody would ever guess it’s just paint.

The best part? This transformation saved me thousands. A new wood door would’ve cost $5,000, and this project came in under $150 using the Retique It kit.
FAQs when planning your faux wood painting technique
How do I choose the right base and stain colors for a realistic wood look?
The key to a convincing faux wood finish is layering the right colors. Start with a lighter, warm-toned base coat that mimics natural wood—something like tan or beige. Then apply a deeper glaze or stain to bring out the "grain" and texture. With Retique It, the guesswork is taken out: their kits come with curated shades for the primer and stain providing you a varity of options.
Can I use faux wood paint on metal or fiberglass doors?
Yes! Faux wood painting isn’t just for wood surfaces. You can absolutely apply this technique to metal or laminate doors—as long as you prep properly. Start by cleaning thoroughly and then apply a bonding primer that adheres to slick surfaces. Retique It’s wood’n primer is especially effective on a variety of materials, making it ideal for doors, furniture, and even cabinetry. If you want an added protection, you could opt to prime your surface first with something like Sherwin Williams Extreme Bond Primer. My door was fiberglass and I just used the kit!
What if the stain dries too quickly?
When working outdoors or in warm conditions, your stain or glaze can dry faster than you expect. To extend your working time, keep a small misting bottle of water nearby and lightly spray the surface before or during application. This helps you blend more easily without harsh lines. I did this myself and it made a huge difference while figuring out my groove!
Do I need to seal my faux wood finish?
A clear topcoat (like a water-based polyurethane) protects the painted surface from sun, moisture, and wear. Retique It advised that their product has a top coat built into it so I have not sealed mine but they do sell one and you can seal their stain layer. I will personally use a topcoat at some point before the summer ends to seal mine!
Do I need to use a wood grain tool?
Not always. If your door or surface already has a wood grain texture, like mine did, you can skip the tool and just enhance the pattern with the stain layer. But if you're working with a flat surface, you may want to use a wood graining tool (included in some Retique It kits) to get a more authentic look. Some DIYers even use household tools like brooms or brushes to achieve that pottery barn look. It comes down to preference!
Final Thoughts on My Faux Wood Door Makeover
If you’re craving that classic wood door look but not the price tag, this is the perfect solution. Using paint that looks like wood gave me a totally new door without replacing a thing.
Whether you’re updating a door, cabinets, or furniture, this faux wood painting technique is a win—especially if you love a good DIY with a big visual payoff. This really is paint that looks like wood.
If you enjoyed this project, check out my entryway project: YOUR GUIDE TO A MODERN SHIPLAP ENTRYWAY: SMALL SPACE, BIG IMPACT - you should see the before!
Or you might like my exterior facelift for $500! SPLIT LEVEL HOME EXTERIOR MAKEOVER: HOW TO ADD VALUE ON A BUDGET
Loved this project? Let’s stay connected!
If you found this DIY guide helpful, don’t forget to save it for later by pinning it to your favorite Pinterest board! It’s the easiest way to come back when you’re ready to tackle this project.

Want more inspiration?

Sign up for my newsletter and get exclusive step-by-step guides, budget-friendly home ideas, and my favorite product recommendations delivered straight to your inbox. Plus, you’ll be the first to know about new DIY projects!
Let me know how your project turns out—I’d love to see your results!